Into The Wild

“I'm going to paraphrase Thoreau here... rather than love, than money, than faith, than fame, than fairness... give me truth. ” -Into The Wild

Sunday, October 28, 2012

Birfday!

Ahh, finally turned 21! I'm not a big drinker, but it's still gunna be cool to be able to get drinks at dinner or spontaneously decide to go out or buy stuff for home. Overall, I had a pretty good week; I like when birthday/holiday festivities are spread out over a few days. 

Since I worked on my birthday, Wednesday the 24th, I went out to One49 for jazz night with some great work friends. Didn't get too drunk though since I had class the next morning, my sister picked me up around 11:45 and I was in bed by 12:30 with my wittle Wallace. I also set up an amazzzzinnnggg internship on Wednesday morning for next semester, super stoked about that. 
After class on Thursday, I hung out with my sister Katey after almost 3 weeks. She took me to a bar called Chuck's on Monroe and bought me a delicious dinner and some drinks! I love my sister time :)

 Since I wasn't able to go to any Eastwood football games, I went to Friday's game with my Mom to see the band play their Halloween half-time show. That night was Becca's night to host a band party, and holy cow was it a party. At least 60 band kids showed up and smashed on some food that my Mom made from scratch. Thank goodness we basically have a second living area in the garage! 
Saturday is a whole other ball game. After work, I came home and got everything ready for my friends' Halloween party. At first, I dressed up as Lumpy Space Princess from Adventure time, but the cotton got too warm so I changed to a skimpy sailor outfit (I've never worn anything to revealing, but everyone thought I looked good!) Let's just say that I drank a little bit too much and highly regretted it this morning! Nevertheless, it was so much fun and a great way to end my duty at Wendy's (I FINALLY got a job at Kohl's!!!!) 

And today, my Dad, his girlfriend, my Grandma, Aunt T, and cousins Kasey and Kelsey came over for a deliciously prepared meal that my Mommy made: chicken chimichangas, mexican rice, and beans. Seriously so good! I didn't think to take any pictures, but here are the links: Chicken chimis , beans, Mexican rice.  Had such a nice time, I love having everyone come together. Unfortunately Jack couldn't come out for any of this because of work, but he came over last Monday and took me on a date to Charlie's Restaurant and Books-A-Million :)

Here are some of my birthday week pictures!

Me and my longest friend Hannah at One49 <3 Looooveee this!

Joshua and I at his Halloween party, before I changed out of my LSP costume!

Me and my girl Codi at One49. Love this picture!
Becca and I before leaving to our parties. She's a hippie and obviously I'm LSP! I know, I look ridiculous.

The Roku that Jack got for me. It's seriously awesome, reasonably priced, and easy to set up.
The bed set that my Mommy got me. Love it!

Soy candle from my Aunt and cousins, they also got me a gift card.

Purse that my sister got me, along with a Kroger gift card.

Purse!


Sunday, October 21, 2012

Bunbuns

Some of you may know about my precious bunny, Floyd. I got him at the Pemberville Fair back in August. First, I tried to win a baby bun at a ring toss game, but failed after spending $8. The girl even gave me 10 extra rings! Then I went to check out the show tent and found one that said "For sale $5 male lop buck 6 months" and thought he was the cutest thing ever. So I called the owner and set up to get him the last day of fair. Honestly, I didn't think the overhead costs would be much, but trust me, they were pretty hefty.


Here is a list of things from Petco that I first bought for Floyd, and how to use each item:


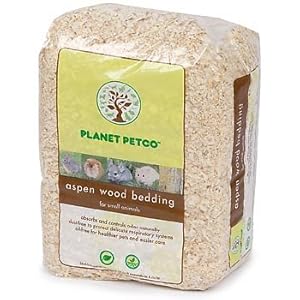
1) Aspen wood shavings for bedding - don't use hardwood shavings, as they can irritate your bun's respiratory tract and are hard and scratchy. 


This cost me $14. Floyd doesn't like a lot of bedding, so after two months I have a little over half left.
2) Carefresh soft bedding. I sprinkle just a couple hand fulls so Floyd has something soft to lay on. He usually just mixes it up with the shavings, so I only bought this once.
I got the plain white, which was the cheapest at $7.49


3) A corner litter box. At first Floyd didn't use his litter box, but when I noticed he was mostly going in the corner across from the box, I moved it and now he uses it regularly! It's easier to litter train a rabbit than a cat! Buns like to lounge and sometimes eat in their litter boxes, so clean it every 2-3 days


I got the blue one. Depending on the size of your cage, you can get one the size of a kitty box or like the purple on in the picture.


4) Pine pellets for litter. I put about an inch of it in the litter box with a hand full of shavings so it's soft enough for him to sit in.


A 40 pound bag is $5 at Tractor Supply Co. Lasts forever since I only use it for the litter box.


5) Timothy Hay. It's essential for a properly balanced diet, as it is the best source of indigestible fiber. Bun's can't pass gas, so the fiber ensures that everything is moving through the correct path.


I buy the Meijer brand since it's only $5. Hay is hay, so I'm not too concerned with the brand. You can also buy hay with carrots, cranberries, marigolds, or mint.


6) Pellets. They provide all of the essential nutrients that aren't provided by the veggies. I know that pellets can get pretty expensive, but I recommend buying the best brand that your budget can buy; Floyd doesn't like cheap pellets like Meijer brand, so I basically have to spend more to get him to eat them. Since everything else is relatively cheap, I don't mind spending some extra money for pellets that he loves. A midsize adult bunny (older than 6 months) should only eat 1/4 cup per day IF he eats lots of veggies too.


Floyd LOVES these. They smell like chocolate, but also cost upwards towards $20 for a 5 pound bag.

Floyd also likes these. These cost about $13 instead of $20.
7) A cage. The cage should be big enough for your bun to lay down and hop around a little. There should be enough room for the litter box, water, food, and toys. Thankfully my friend Katey still had a cage and water bottle from her bunnies. Saved me about $65.

I have this cage in green. I think Katey paid $50.

I have a grey bowl for pellets. You can buy a bin feeder for hay, but I use cardboard egg cartons. This way, Floyd can also eat/play with it!

Katey gave me a large size one with bunnies and carrots on it. I saw one at Petco for $8.99
8)Toys! Bunnies need mental stimulation to prevent boredom, which can lead to chewing on things he/she shouldn't chew on. Along with the toys below, Floyd likes cardboard and newspaper, but you can try any toy with your bun.

$3.99 with Petco rewards card. Originally $5.99.

$2.99

2.99

Apple wood chew sticks. $3.99 for a 6 pack.

Sea salt rock for licking. $2.99

$3.99

9) Veggies. A diverse vegetable diet provides the essential nutrients for good health. Fruits are good too, but in moderation. Floyd likes escarole, kale, arugula, parsley, basil, endive, cabbage, leaf lettuce, broccoli leaves/stems, kohlrabi leaves, spinach, brussel sprouts, mustard greens, turnip greens, dandelion greens, carrots, apples, melon, and much more. The link I'll post at the end will give a detailed list of what and what not to feed your rabbit.

10) Playpen. I don't think this is necessary, especially because they cost upward toward $30. You can buy fencing and make a round one, or let your bun roam around the house or garage if you trust him/her. Floyd loves running around the garage for hours at a time, and he gets along with my dogs wonderfully, so it's not a problem. It is necessary that your rabbit gets at least 30 minutes of exercise a day.

Being a rabbit owner really isn't as much work as people think or say. He/she will love you as much as you love him/her. Advice: read up on the proper care. They have specific dietary needs, so make sure you know what to feed your rabbit. I got all of my information from House Rabbit Society. Hope this blog helps!


Song of the day:

Wednesday, October 17, 2012

Friday, October 12, 2012

New beginning

I'm sure that some of you can relate to the desire to get fit and healthy. I'm also sure that some of you can relate to the lack of motivation. This is my  problem: physical motivation. I want to get fit and healthy so badly, and I enjoy working out, but actually getting to the gym is where my efforts come to a halt. I'm a commuter, so when I'm done with with classes for the day all I want to do is drive the 30 minutes to get home, not go to the gym. Lousy excuse, I know. Another one of my issues is will power: if I'm craving a large fry and Diet Coke from McDonald's or a crunchwrap from Taco Bell, it's really hard for me to pass it up. Especially if I drive by more than one throughout the day. When I go out to eat, I end up getting at least two glasses of Diet Coke or Pepsi. I don't get a salad, I get a sandwich and fries. The first time I really noticed my weight gain was in 2008, after being on the birth control shot for a few months; I noticed a bunch of stretch marks on my inner and outer thighs and the sides of waist. From that point, the weight kept coming. I would diet and exercise consistently for a couple weeks and then give up because I wouldn't see results. Now I understand that it will take quite a while to see results if I do it the healthy way, which is not to starve myself.

All that said, I have discovered a really awesome blog: Undressed Skeleton. Her name is Taralynn, and she has so many tips on living a fit and healthy lifestyle, from grocery lists to workout regimens to testimonials. Everything. And the best part about it is they are all tips that she uses in her every day life to remain healthy. I've been reading her content for a little over a week now and have found that having that sample grocery list is a huge help. I highly encourage you to check out her blog, it's also to the <left< under "Don't miss these blogs!".

Undressed Skeleton is a huge salad advocate, and she has so many ways to add deliciousness to a salad to prevent boredom. So I decided to make a salad for lunch today, along with some other sides.
About 8 carrot slices, 1 slice of turkey, about 2 tsp of sweet cilantro sauce (posted in "Oomienoomies")


Soup, salad, carrots, hummus. I didn't eat the yogurt because it hadfruit chunks.

Vegan, reduced sodium, no MSG, DELICIOUS

Gluten free

Some other items that were on my grocery list (*=from Undressed Skeleton): truvia sweetener*, 3 avocados, whole pineapple*, apples*, 2 cans peaches (with light syrup), fat-free plain cream cheese, mini babybel cheese (SO GOOD!), organic vegetarian chili, romaine lettuce*, spinach*, FF ranch dressing*, FF French dressing*, balsamic vinaigrette*, almonds, FF cottage cheese, whole wheat mini bagels, strawberries, broccoli, cauliflower, grapes, vanilla chobani green yogurt*, almond milk*, 10 grain waffles, sugar-free syrup, all natural honey, 1 can unsalted corn, 1 lb. chicken breast

One idea that I really liked was to put the salad lettuce and fresh toppings into separate containers, so they're kept fresh longer and always ready to eat. I'm big for organization, so this is great.

Healthily stocked fridge!


Salad stuffs!


Another reason that I like Undressed Skeleton is because Taralynn loves coffee a little too much, just like I do. Since I don't really like the taste of plain coffee, I load it with creamer and therefore fat, sugar and extra calories. She gives a a great alternative to flavored creamer: a little bit of ground cinnamon, almond milk, and truvia sweetener. It's actually really, really good. That's saying something, considering I love my coffee with extra French vanilla. Tomorrow I'm going to try adding pumpkin spice, 'tis the season!

More than likely, I won't frequently post about my fit n' healthy journey because I have Undressed Skeleton linked in this post and to the <left<, and there are so many good health blogs already out there. What I'll probably do is just post about milestones like first pounds lost, new ideas, stuff like that. My next goal is to find an elliptical machine and tv on Craigs List. I can put them in the basement along with my yoga mat and workout videos for the perfect workout room!

 I hope you found these tips as helpful and inspirational as I did, and good
luck!

Wednesday, October 10, 2012

12 Ways to Welcome Fall

Well, it's the time of year for sweaters, boots, pumpkin spice, apple pie, snuggly blankets, and all the great things about fall. I love seasonal decorations, scents, and food, so I do my best to be as festive as possible.

Here are some ways in which I welcome the Fall season:

1) Stock up on cute sweaters and sweatpants from Savers and other second-hand places. I recently discovered Clothes Mentor's amazing selection of sweaters. 
2) I can never have too many cute pea coats, especially when I get them for under $20!
3) Get several pairs of gloves (I tend to lose them very quickly), a couple different hats (light, super heavy), and a couple cute head bands (the kind that cover your ears). 
4) Rent scary movies (for Halloween) and other films that give me that fuzzy feeling along with the seasonal joy. Snuggling up with the pups and Jack during a good movie is the best! 
5) Buy several pairs of thick socks; my winter boots are kind of loose (from L.L. Bean), plus I just like wearing them.
6) Compile some seasonal recipes and make plans to use them. Love this!
7) Burn seasonally-scented candles. Big Lots has an AWESOME selection, and their cheap! I think I have 10 candles right now..hehe.
8) Decorate, decorate, decorate! Put pumpkins on the front porch, use seasonally-colored hand towels, seasonally-scented hand soap, a fall-esque table runner. You get the picture. Thankfully my Mom is down for all this!
9) Stock up on leggings. I love wearing long skirts, so having warm leggings is essential!
10) Get pumpkin pie coffee creamer. Mmm.
11) Have an abundance of hot chocolate, for when I want something warm and tasty at night. 
12) Probably the most important of all: stock my car with toilet paper/tissues (for when I'm sick), an extra hat and pair of gloves, a warm blanket, a safety kit (mine has little cones, a flashlight, batteries, and some tools), and a car phone charger, all in case I break down. I drive a lot so I always want to make sure I have everything I need in case of an emergency. 


These are all the basic things I do to get ready for the Fall weather and season greetings. Hope this sparked some ideas for you! Check back for a Winter/Christmas list too!

Random picture of Waldo. Isn't he the CUTEST!

Sunday, October 7, 2012

More food!

I know that I have already posted some recipes, but this one is just too good to go unshared. On the last night of our service trip to NYC, we went to an authentic Indian restaurant in walking distance from our hostel in Manhattan. Before this I hadn't ever had Indian food before, but I was still excited to try it. Let me tell you, it was absolutely delicious. I didn't even know half the stuff I was eating but I didn't care because it was so good. One thing that I remember eating is a chickpea masala; masala is a mixture of any number of spices that is ground into a paste or powder and then used in South Asian cuisine. That restaurant then inspired a trip to Tandoor with Jack. Tandoor is an authentic Indian place on Reynolds Road in Toledo. This place also had an amazing chickpea masala, among other delicious items.

Finally, I decided to try cooking an Indian dish myself; what better to try than my favorite?! Instead of a masala, though, I found a recipe for coconut tofu keema. This recipe is very vegetarian friendly (I'm not strictly vegetarian, though I do try to eat more veggie meats and other foods) and extremely simple to make, especially once you are able to make it without following a recipe. The above link will take you to the original recipe, and I will share my amended version.

  •  1/4 cup olive oil
  • 4 cloves garlic, pressed
  • 1 14 oz package extra firm tofu, cubed (I use Nasoya)
  • 1 16 oz can coconut milk (found in the international food aisle)
  • 6 cups tomato sauce
  • 1 15 oz can chickpeas 
  • 2 whole carrots, chopped 
  • 1 tbsp ground cumin
  • 1 tsp curry powder
  • 1.5 tsp ground ginger
  • 1 tsp salt 
  • 1 tbsp red pepper paste (I just sprinkled red pepper flakes)
1) Heat olive oil in a large wok over medium heat. Stir in garlic, tofu and carrots (adding the carrots now will allow them to become softer, if you want them to be crunchier, then add with the chickpeas). Cover and cook for 5-10 minutes or until tofu browns to desired level, stirring occasionally.
2) Stir in coconut milk, all spices, salt, and chickpeas (adding the chickpeas at this time will allow them to become softer and soak up all the flavors). Bring to a simmer.
3) Stir in tomato sauce. Six cups is a lot of tomato sauce, so be careful as this step could get messy.
4) Cover and simmer about 30 minutes, stirring frequently to prevent burning.
5) Serve over hot rice, and you can even cut tortillas into triangles and brown until crispy to dip in the juice (SO GOOD!)

As you may have assumed, cumin is the dominant taste in this dish. The tomato sauce added to the coconut milk is what gives the milky orange color. Since I've made this dish like 4 times now, I don't even need to follow the recipe in regards to when to add ingredients. Now, this recipe yields an entire wok of keema. If you or another person are the only ones eating it, then I highly suggest cutting the recipe in half; I was eating keema for 3 days even after cutting down the recipe.

Tastes and looks just like the masala I ate at Tandoor.

Monday, October 1, 2012

Craftsies

This past Summer really kick started my crafting obsession. Several nights of Pinteresting resulted in intense crafting; we both still use everything that we made! I'm going to share a few with you guys in hopes that you try and love them as much as I do!


Pretty Binders

These were so fun to make and cost about $20 for three binders and all of the fabric. Here is the link with the original directions with step-by-step pictures, and here is the shortened version:

  • I used a 1/2 yard of canvas fabric for each of the three 1 1/2 inch binders. There was strips left over so I saved them just in case I wanted to use them again. 
  • Open the binder, lay flat on the fabric, and cut so that there is 1/2-1 inch to fold over the binder.
  • Cut the corners so that there isn't a bulge when the corners are folded over. 
  • This part sounds confusing, but it's really easy. Close the front flap of the binder, hot glue the fabric to the flap, and then close to glue the folds down. Next, glue the spine. Lastly, close the back flap and glue it.
  • Rub the fabric so that it's even and flat.
  • This part is optional, if the binder has pockets then this can be skipped: cut an additional piece of fabric to cover the exposed binder. 
Finished products! The step-by-step pictures look perfect, but believe me the insides of mine are far from it ;)


Magnet Board

I don't have a picture of this one yet, but I will once I get home. This one was super easy and is super useful!

  • Go to the Dollar Store and get a standard size cookie sheet; it can be flat or have edges (mine has edges). 
  • Buy a small can of spray paint in your choice of color, I used plum purple. 
  • Evenly spray paint the front of the cookie sheet, I didn't paint the back. 
  • Hot glue a ribbon to the back in a loop so that it will hang.
  • I glued some marbles on it to add some bling.
  • Put a thumb tack in the wall and hang! 
  • I also got a pack of magnets from the Dollar Store too!  
I already had the marbles, ribbon, and spraypaint, so this project cost me $2 and took about 5 minutes!

Colorful Desk
  
My neighbor came over one day and asked if I wanted her daughter's old desk. After I took some measurements and realized it would fit perfectly in my room, her husband helped me carry it over. The next day I began spray painting! Thankfully the desk was free because I spent upwards to $50-$60 on spray paint, then again the desk was the cheap lacquered wood and I skipped all of the sanding. The project was time consuming and tedious, but the end result is so worth it.
  • I did this in our garage with a giant sheet on the floor.
  • I used a medium sandpaper brick and sanded the top so that it was smooth.
  • Wipe the surface down with a damp cloth, then a dry one. 
  • Spray painting is actually a little harder than you may think. Hopefully I can effectively explain how: spray along the grooves in the wood in short, wispy strokes. If you hold the can in one spot for even a second too long the paint can start to drip and streak. 
  • Do the above process with primer first and then the color. The primer allows the color to better soak into the wood, especially if the wood has a glossy finish.
  • Wait about 10 minutes in between coats. 
  • Spray paint the entire desk in a pattern that you think is best. 
  • Wait 24 hours for the paint to completely dry. Touch up as you deem necessary. 
  • I didn't paint the back since it sits up against the wall. 
It's PERFECT! I love it. 

 Here is a Pinterest board all about painting furniture if you need more details.


Mason Jars
  • If you have some mason jars lying around, like a lot of people that I know, then this project is perfect!  
  • Choose any jar that you like. Use acrylic paint, this is most durable on glass. I used FolkArt acrylic paint from Hobby Lobby.
  • Wash the jar(s) with warm soapy water.
  • Add just enough water to make the paint a little more liquidy so that it better swirls around the inside of the jar. 
  • Lay some newspaper on the floor, or wherever you're working, to prevent a big mess.
  • Squirt some paint on the bottom of the jar, enough so you will be able to turn the jar on its side and rotate to evenly spread the paint. 
  • If your jar is larger, like the blue one that I made, you can use a sponge brush or a large paint brush to spread the paint on the sides to avoid streaking.
  • Use as much paint as you deem necessary. I definitely overcompensated, but both jars turned out awesome. 
  • Turn the jar(s) upside down and set on the newspaper to prevent pooling of the paint in the bottom.
  • Glue some jewels or other bling to your jars for some extra pop!
I used a brush to spread the paint in the blue jar. For the yellow jar, I just kept rotating to spread the paint.

Here is the blog that I found on Pinterest with a more detailed tutorial, but the process is pretty self explanatory.

I hope you all find these craft projects as fun as I did!